Saturday, September 15, 2012

Subtle Saturday

I apologize for the late posting! Happy Saturday, loves! It's been a hectic day and I just got to a computer so I apologize if you've been waiting! I'm making it in under the midnight mark though so it's still fitting to be called Subtle Saturday! Here it is, just for you!

Subtle Saturday (#3 September 15, 2012)


I know today is Saturday so the last thing (hopefully) on your mind is work! Maybe you do work weekends so this could apply to you this weekend, or on Monday, or any day soon! I know the economy is in rough spot and finding jobs is NOT easy right now. Believe me, I know! There are so many key factors to getting the interview and landing the job. Your answers in those little personality quizzes when you apply, your cover letter and resume, your voice mail answering message when a possible future employer call all weigh into their decision and opinion of you. So let's say you get through the application and they are interested and call you in for an interview. Here's the key part! You've got a foot in the door in the sense that they now know your work history, a little bit about you (professionally anyway) through your cover letter and application, but now you have to wow them during your interview.

It's not really fair to say, but it's true: a book is judged by its cover. Let's face it, if you don't put yourself together for the interview trying to get a job, especially when it's so hard today, when are you going to? The key is polished and professional, basically putting effort into your look, showing you care about yourself and how you present yourself. Now for makeup lovers and non-makeup lovers alike, what is the "right" thing to do as far as makeup and hair and clothing? Do you go all out to show you care or is there such a thing as too much?

Here is my opinion:

Clothing: I believe the clothing for any interview, from McDonalds cashier to CEO should always be professional. Your clothing should fit properly (too tight AND too loose are NOT good) and be clean, as well as neat. Whether it be ironing, tucked in, buttoned, whatever that particular outfit should look like ... make sure it does. Choose professional colors: black, brown, navy blue, gray, tan (or in those color families). Pops of color can be okay, especially in artistic fields, but make sure it's classy and professional. Pants should be worn appropriately and shirts should NEVER be low-cut. Shoes should always be professional too: heels, flats, anything that matches your outfit. NEVER EVER are sneakers, flip-flops, or casual sandals appropriate. The key, in my opinion, is you should *ALWAYS DRESS FOR AT LEAST THE JOB POSITION ABOVE THE ONE YOU ARE INTERVIEWING FOR!* This means that if you are interviewing for a stockroom position, dress as if you're going to be selling on the floor, and if you're up for a sales job, dress the part of a manager. It shows that you care about your interview and not only want future advancement opportunities, but allows the interviewer to see you in that light.

Hair: I'm going to focus mostly on women for this. Essentially, just make sure your hair is done! No crazy colors (unless it's a funky hair salon where that would help your case), meaning only naturally available shades. If you're a blonde, but went dark, that's perfectly fine! Just make sure it's a form of a color you could have been born with ... aka no aqua blue or Hulk green or neon pink! Whether you style your hair curly, straight, wavy or somewhere in between, today is not a day to forgo it! Style your hair and make sure it will stay that way with gel, hairspray ... whatever. No messy buns EVER, but well-kept "ballerina" type buns are perfectly fine, and very "in" right now! Ponytails I'd personally avoid, as that more says "gym" or "cleaning" than "professional- HIRE ME!", but certain styles may be okay. If you question it, don't do it.

As for the men, just well-kept. Brush your hair if you have it, apply product to keep in place and whether you shave your face entirely, keep some facial hair, or grow a full beard - groom it!

Makeup: This is a BIG thing! For women, the fact is whether your interviewer is a woman or a man, makeup matters. Maybe if you're going to be a scientist in a back lab it won't, but in general, it will. It shows you care, that you put time into your look in the morning. Don't feel as if you need to go insane and create a look that would be in a MAC cosmetics ad (unless of course you are interviewing for them!). Just do a look that fits you. Be sure to conceal under your eyes and any redness (typically around the nose and anywhere else you may have it), blend and even out your skin tone and set it with powder. DO NOT FORGET PRIMER so your makeup can stay put! Bring blotting sheets or oil-absorbing powder for just before to touch-up. Soft eyes, like a light-brown smokey eye, are great to look professional and elegant. Thin liner is perfectly acceptable; however, if you're a fan of lower lash line-lining, only go with the waterline. Your lower lash line can be perceived as a "going out at night" look rather than professional. Of course, apply mascara and do your brows. Blush is a key piece too to add color so you don't look washed out and ghostly. For your lips, I'd go simple for most job position interviews. Nudes, pinks, and peaches are ideal. I would recommend lip stick and gloss for staying power and so it will be visible.


The key is to looking professional and hire-able and avoiding looking over or underdone. I felt this was pretty fitting for a Subtle Saturday because to me, interview looks are just that: finding subtle ways to appeal to your future employer! Dress, accessorize, and prepare yourself like you care and it shows! Best of luck, loves!

Feel free to visit me on Facebook for more looks or look throughout my blog too! If you have any questions or ideas, comment below or write me on Facebook!

Friday, September 14, 2012

Fierce Friday

It's Friday! Woohoo! The weekend has arrived and it's time to let your hair down! Or put it up .. or style it .. and throw on some makeup ... and paint the town RED! Not to mention what's in this season, RED LIPS! Today is a post on a Friday night look just for my BEAUTIFUL readers! Let me know what you think!

Fierce Friday (#3 September 14, 2012)


Here it is:


1. Apply your flawless face, concealing anything you need to, blending, and creating a perfect canvas! Apply your bronzer & blush. Here is the link to the "Flawless Face" post from not too long ago!
2. Next, prime your eyes and apply a matte beige shadow on your entire eyelid.
3. Now, add a deeper, neutral shade with a shimmer to your lid from lash line to the crease. Work this color into your crease as well.
4. Next, apply a deep color (I used a plum red shadow) in your outer corner for a more dramatic look. You don't want to use black or build the color up too much because it will end up competing with your lip look.
5. Add a light, soft, shimmery peachy pink shadow as your highlight color on your brow bone and inner corner. This will open your eye area and make your eyes look brighter.
6. Line your upper lash line and lower water line with a dark brown liner. Apply mascara and fill in your brows.
7. TIME FOR LIPS. Simply apply a red lipstick. I used a cherry red color for this look for a bright, pop of color. I applied a clear, blue lip gloss over top to make the lip look less matte, to hydrate my lips, and to bring on the blue undertones in the lip color instead of orange hues. Blue toned colors also whiten teeth so there's a little extra bonus from your gloss!

And there you have it! Fierce Friday Night look with sexy, red lips!

Thursday, September 13, 2012

Teaching Thursday

***TODAY'S POST IS THE 100TH POST!!!***

Happy Thursday! We are officially in the end half of the week and I hope you're enjoying yours so far! I hope you are all finding September's Beauty Week interesting, helpful, and informative ... and of course FUN! Anyway, here is Teaching Thursday!

Teaching Thursday (#3 September 13, 2012)

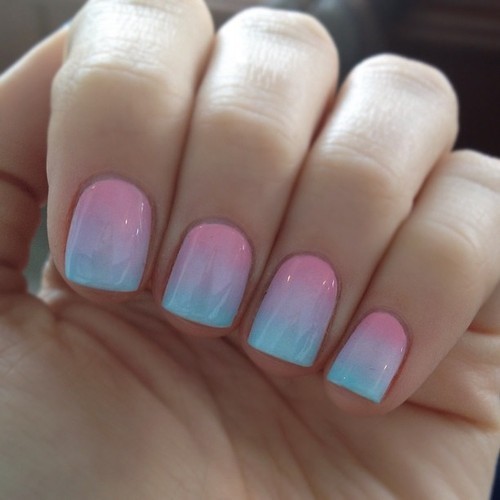
Today's teaching post is about a great, artistic, new nail polish trend: Ombre Nails! It's that two-tone nail polish look where one color fades into another. It looks somewhat difficult right? Like maybe I need lots and lots of practice to do that? Nope! It's really simple. All you need is 2 color polishes and a top coat.

- When picking your two colors, you'll first need to decide the look you're going for. For subtlety, you'll need two colors that compliment each other or for a more bold, dramatic look, try two colors that would otherwise be "opposite" or clash.

- You'll also need a sponge. A makeup applicator wedge sponge is perfect for this. You should also keep near by a tooth pick and a protective cover (newspaper, magazine, foil, etc.) since this gets a little messy!

Picture from StyleCaster
*First: Begin by applying the lighter of the two shades. Make sure it dries completely.
*Next: On a flat surface (ideally on foil or wax paper), paint a good amount of each color right next to each other. Make sure they touch.
*Then: Use your tooth pick to swirl the colors together where they met. The area which you swirl it will determine the length of the graduation of color. Long graduation=bigger section mixed; less fade=mix only slightly.
*Now: Take your sponge and dab it directly over the swirled nail polish a few times. Dab the sponge directly on your nail, with the lighter colored side (your base color) closest to your cuticle. Continue to dab it lightly and move very slightly up and down the nail.
*Feel free to repeat this step as much as you'd like to achieve the desired effect and pigment. It is very important to be SURE each layer is COMPLETELY DRY before adding another. If it's not, it will likely smear and ruin the entire look.
*Next: Apply the top coat to seal and protect the color from wear and chipping. The sponging effect makes the nails somewhat bumpy so you may want to apply a few layers of top coat to smooth it out.

As you may have already guessed, this is a messy nail polish application. Using the sponge will undoubtedly leave your entire fingertip covered in polish. Simply use a q-tip dipped in nail polish remover to spot-remove excess polish. You can also use a small brush (tiny paint brush or lip or eye liner brush) dipped in nail polish remover to clean up a little more precisely and around the cuticle.

AANNDD! Don't forget to revisit last month's Teaching Thursday post for amazing, quick, INEXPENSIVE tattoo concealing!

Wednesday, September 12, 2012

Wellness Wednesday

Happy Hump Day, aka Wednesday, loves! The week is half over ... yay! I hope you're having a great week so far and are enjoying all September's Beauty Week has had to offer. I'm curious if any of you have plans to recreate my Philadelphia Eagles makeup look or even create your own for your teams colors? Have any of you ran out to try the Sally Girl mascara? If you haven't, go do it! It really is great! I hope you enjoyed my information from yesterday on all the different nail polishes and some tips on telling the duds from the deals and maybe I let some of you know about a great, inexpensive nail polish brand!

Today's post, as I'm sure you already know, is "Wellness Wednesday", which is quickly becoming my favorite. It's my one day a month where I devote an entire post to overall wellness and tips for you that I find generally from my First for women magazine. I love to share these interesting tidbits I find with my readers and share with you all an AMAZING, inexpensive magazine that offers so much, for us normal people especially! Don't forget to check them out the next time you're standing in line at the store and give them a go! The subscription is TOTALLY worth it!

 Well without any more discussion, I'm going to begin Wellness Wednesday with a tip you can use some of yesterday's post for:

Wellness Wednesday (#3 September 12, 2012)
(Tips from First for women magazine Sept. 10 2012 edition)

^ from my First magazine on Facebook!
1. Hate it when all your keys look the same and it takes you 10 minutes to get in the door after trying your whole ring to find it was the last key? Don't mix them up anymore with a simple, essentially costless idea: NAIL POLISH!

Simply take a different color for each key (any polish you have lying around will do) and paint the top portion. Let it dry entirely then paint the other side. Finish with a top coat or even a paint sealant and you're good to go! (pg. 6)


2. Two birds, one stone to ease the pain of sunburn? Yes, please! We all know the AMAZING wonders aloe works for tight, dry, painful sunburned skin. Try filling an ice cube tray with the gel you buy for sunburns and let freeze! The cold and aloe combined are a treat to such sensitive skin! (pg. 6)


3. Hate that tight, rough feeling of brand new jeans? Try this! The first time you wash a new pair of jeans, add 1/2 cup of white vinegar and 1/4 cup of baking soda to the wash. First magazine tells us "The vinegar's acetic acid breaks down the starch (which manufacturers add during weaving to keep jeans looking crisp) while the alkaline baking soda dissolves the residue left behind, softening the fabric. Just be sure to wash the jeans inside out to prevent fading." (pg. 15)


4. Ever struggle with varicose veins? Want to erase them without surgery? Eat more basil! First tells us "to reduce the appearance of dark blue veins, season dishes with basil. According to a study in the Journal of Vascular Research, the vitamin K in this herb helps prevent minerals from coating vein walls and clogging blood flow-which stops blood from pooling downward and keeps veins from stretching and bulging." (pg. 29)


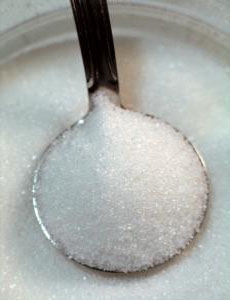
5. Special event tomorrow and just found a pimple? Clear a blemish overnight! First tells us that simply "mixing 1 tsp. of sugar with a few drops of water, then dabbing on the affected skin, and leaving it to sit while you sleep" will make it disappear! "The sucrose will inhibit the growth of bacteria, reducing redness and swelling by morning." (pg. 86)


Well there you have it, my loves! I hope you enjoy Wellness Wednesdays posts as much as I do! I just love finding new uses for things sitting at home, finding simple cures and fixes using things you'd never think of, and innovative ideas to solve little problems without dishing out cash. I hope you find these posts helpful and don't forget to give First magazine a try!

Tuesday, September 11, 2012

Truth Tuesday

Hey loves and I hope you're enjoying September's Beauty Week so far! Today is Truth Tuesday and it's the day I spill on a beauty-related subject, whether good or bad, I give my honest thoughts & opinions. I have spent a lot of time in the beauty field and have a sincere passion for all things beauty (like you didn't know ;) ...) so I love to share my knowledge and expertise with all my fellow makeup addicts! So without anymore intro, here it is:

Truth Tuesday (#3 September 11, 2012)

Today I'm going to tell you my thoughts and opinions on all the nail polishes out there. Obviously one blog post can't encompass every nail polish brand and type so the focus on today's post is inexpensive nail polish versus the more expensive counterparts and if there is a true difference in the quality and longevity of wear if you spend a little more money.

To start some brands on the costlier end of nail polish that I've tried & tested are OPI, Sephora by OPI, and Butter London. All 3 are great polishes. They apply evenly and even the first coat provides color and a second coat is ideal. Two coats will give true color and when worn with a top coat, the polish lasts too. Obviously polish on your toes will generally last longer than your fingers, unless worn over acrylic nails, because your fingers do a lot more work and get more wear, but these polishes provide good color and decent wear-ability.

However, the downside is really the price. OPI generally costs about $8.00, Sephora by OPI costs around $9.50, and Butter London's polishes cost $14.00. In the scheme of things, $8.00, $9.50, and $14.00 isn't very expensive, but it adds up ... and for nail polish!

On the cheaper side, there's L.A. Colors, Sinful Colors, NYC, and Hard Candy. These range from $1.00 per bottle to about $4.99 for a bottle. However, how do you know which one is worth saving the money without sacrificing quality? It's pretty much a guess and check. It helps to open the bottle in store and partially remove the brush from the bottle and look at the consistency of the polish on the brush. If it seems very sheer or slides right off the brush instead of forming the shape of a rain drop, it probably isn't a very quality polish. L.A. Colors, for example, makes nail polishes and something called "Nail Art Deco Polishes", which are the ones used to do designs. The design polishes are very nice, but the actual nail polishes are very faint, take many coats before you get any real color, and chip extremely easily.

NYC & Hard Candy's polishes are definitely much better than L.A. Colors, but still have their downfalls as far as quality, color, and lastability.

My favorite, favorite, favorite polish is Sinful Colors. They can be found in Walmart and Walgreens for $1.99. They come in so many different colors and types. They come in matte, shimmer, glitter and endless colors and shades within a color. They release collections like OPI does and have staple colors all the time. They are often on sale at Walgreens for $1.00 too so you can get an even better deal! They are toluene, formaldehyde & DBP free, which is a great thing too! Sinful colors are high quality and 2 coats is plenty. They last just as long as their costlier counterparts so why not save the money?

***DUPE ALERT: MAC's new collection Style Seeker, has a harvest orange color nail lacquer in "Styleseeker". Sinful Colors makes a polish called "Cloud 9" that is a very close dupe. It's a little brighter than MAC's, but it's definitely close and at $16.00 a bottle for MAC's and $1.99 for Sinful Colors ... I'll take it.***

Below are some of my favorites, but there are many MANY more!
Professional Nail Enamel, 24/7Professional Nail Enamel, 24/7Professional Nail Enamel, 24/7


Professional Nail Enamel, 24/7
Professional Nail Enamel, 24/7Professional Nail Enamel, 24/7

Monday, September 10, 2012

Mascara Monday

Happy Monday, gorgeous! As all my blog readers know, Mondays in my monthly beauty weeks are Mascara Mondays. I write about & review my favorite mascaras for all of you. Mascara is a tough beauty product because there are so many on the market, ranging in price, brand, style, color, formula, brush-type, and more. These Mascara Monday posts are to share with you a variety of mascaras I've tried, tested, and loved from super inexpensive to on the costlier end, from drug stores to department stores, to share with you all some choices for your mascara! On to Mascara Mondays:

Mascara Monday (#3 September 10, 2012)

Sally Girl Mini Mascara in "Jet Black"

This mascara comes in both "Jet Black" and "Brownish Black" so you have options. It is described as "intensely pigmented for a dramatic look". Sally Girl says that "it's great for lash definition", meaning it will lengthen and volumize the individual lashes to create gorgeous, luscious lashes.

It is, as the name says, a mini mascara so it fits in pockets, purses, wallets, and clutches with ease. The other benefit to a mini mascara is you'll actually get to use the entire product you purchase before the mascara would dry out. It of course, being mini, will need to be replaced a little more often, but if you buy 2 or 3 when you visit a Sally Beauty Supply, you'll be set.

Best of all, it only costs $.99! Sally Beauty Supply also offers a rewards program. It costs $5.00 to join, but you do get a discount on all your purchases.

Give it a try & let me know what you think! I've found it gives me personally super dramatic lashes without having to apply multiple coats, lasts until you remove it with makeup remover, and is really inexpensive. Let me know what you think after you try it, loves.

A product thumbnail of Sally Girl Mini Mascara Jet Black

Sunday, September 9, 2012

Seasonal Sunday (September 2012)

Hey there, my gorgeous makeup lovers! I hope you are all enjoying your September so far! Finally (at least in my area anyway), the weather has broken! It's finally not 90 degrees all day long and boy, are the 70's nice! I have had a series of unfortunate events and my camera's battery or the battery charger has decided to quit on me so this week's pictures will be the final ones for a little while. My iPad takes pictures, but the quality is only so-so, so I'll see what I can do until I find a way to fix my issue or get a new camera! Regardless, September Beauty Week will go on!

As many of you, especially those with husbands or boyfriends ... or any male family member, know today is the season opener for football! I'm sure plenty of ladies out there are excited too and the rest of the women know that Sundays & Mondays are now rather busy for the man in their lives. Whether you love football yourself, embrace it and cook the halftime snacks for your man, or are just trying to get into football (for him or yourself), why not do so to the 9's? Might as well throw on a jersey of your favorite (or your man's) team, or at least a shirt to match? How about your makeup though? What about doing team-theme eyes? I am from Philadelphia and my family is essentially split down the middle on Eagles vs. Steelers. My hubby is an Eagles fan, as are my grandparents, so I made a "Go Eagles" onesie for my Zoe and did my makeup in tribute to the Philadelphia Eagles colors. Here goes:

Seasonal Sundays (#3 September 9, 2012)

"Philadelphia Eagles ... Football Chic"


To get this look:

- First apply your flawless face. I used the same makeup in my Back-to-School post with a deeper pink/nude blush.
- Next, prime your eyelids and under your lower lash line. I use (as always) MAC's Paint Pot in "Painterly".
- Now to get the eye look above, you will first apply the darkest shade. I applied a matte black shadow to my outer corner, to about halfway in to my eyelid. I brought the color a little farther in on my lid towards the bottom near my lash line.
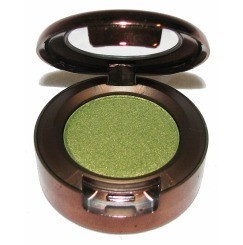
- Next, I applied a deeper green shade with shimmer (not dark or hunter green though) to my lid from the inner corner to meet the black shadow. I worked some of the green onto the black to get a blended look.

- Then, I took a little more of the black shadow and reapplied it to the outer corner for definition.
- I lined my eye with a black eyeliner on my upper lash line and my lower waterline (inner lash line). I then took a flat, angled eyeliner brush and applied the black shadow in a smudged line under my lower lashes.

- I applied about 3 coats of mascara (in black of course) to both my upper and lower lashes.
- Next, apply your brows. I use NYC's eyeliner/brow pencil in "Taupe".
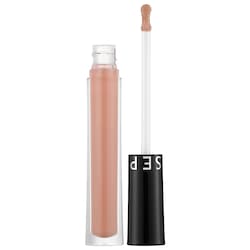
SEPHORA COLLECTION - Ultra Shine Lip Gloss


- Finally, finish up with a soft pink (or nude if you'd prefer) lip. I used MAC's lipstick in "Angel" with Sephora's Ultra Shine Lip Gloss in "20 Shiny Perfect Nude". Feel free to use any soft pink lipstick and nude lip gloss to recreate this look!


Lots of love, gorgeous! Go EAGLES!